Real World Web Application Security Testing
Introduction
Web application security testing in the real world rarely provides opportunities for getting a reverse shell and ultimately “rooting the box” as is our usual goal in CTF scenarios. Nevertheless, it is very rare to find web applications with no significant vulnerabilities, and in my experience it’s nearly always possible to gain access to information and functions that are supposed to be restricted, often by getting access to the administrator account or equivalent. In this post, I’ll walk you through the tried and tested techniques I’ve employed over many years to achieve consistently good results.
And before we get started, if you’ve ever read a web application pentest report you’ll most likely be very familiar with the many low-rated vulnerabilities that seemingly every site suffers from: Overly permissive CORS policy, secure flag not set on cookie, no anti-CSRF tokens, weak SSL ciphers supported etc. etc., the list goes on. I’m not going to talk about these types of issues in this post, not least because any decent web testing tool will find those automatically for you anyway, but instead I’m going to focus on those areas likely to uncover the high or critical-rated vulnerabilities lurking in your target application which you need to apply intelligent, manual testing techniques to find.
Before you start (officially)
Due to the nature of web apps, it’s possible to do a lot of non-invasive and perfectly legal recon before you start the official engagement. This is particularly true if you are testing one of your employer’s web or intranet sites, as you have effectively unlimited time on target before starting officially. Use this time to learn as much as possible about the site. Browse around as much as possible, proxy through Burpsuite and get a sitemap built up. Read the source code thoroughly. Even now, developers can and do make stupid mistakes like leaving commented out sections in production code that were used during development and testing, and these can sometimes reveal very useful information about the site operation you would not have access to otherwise. Make sure you dig around thoroughly in the JavaScript. Particularly with modern sites using JS frameworks, you may well be able to discover a lot about the site structure including filenames and paths that are otherwise only accessible to authenticated and unauthorised users.
If you have access to the corporate LAN and/or SharePoint, do some basic searching for the name of the site, or its acronym/common name etc. You’d be surprised how many times users post information like usernames or even passwords in Word or Excel documents and then fail to secure them properly. Site user manuals are my favourite types of resource, because invariably they include plenty of screenshots so you can see what the site looks like once you’re logged in. Again, you can probably get page names, file paths and usernames from such resources and these are going to be invaluable later on. If you’re not on the corporate network and are testing a remote website, it’s still worth searching for information and files like this online. It’s amazing what finds its way onto the Internet, generally through well-meaning but clueless users thinking it would be a good idea to post the user manual somewhere where the whole world can see it!
Finally, at this stage, if the site is running on top of some COTS platform, do your research and get hold of the documentation for the software. Invariably there will be default user accounts for the platform and often some of them won’t have been changed (particularly the ones that are not actively required or used in the particular implementation you’re working with). Depending on the platform there will often be management or developer interfaces running by default on different ports. Browse to them and make a note of any that are available. And, obviously, research any published vulnerabilities in the particular COTS platform being used. Examine response headers for version numbers and if that yields nothing, try browsing for non-existent pages as the default “Page not Found” page will often have identifying information and version numbers in the footer.
In summary, by the time you’re ready to start testing properly, you should be hitting the ground running with a stack of useful information and a good idea of what your game plan is going to be.
Let’s get testing!
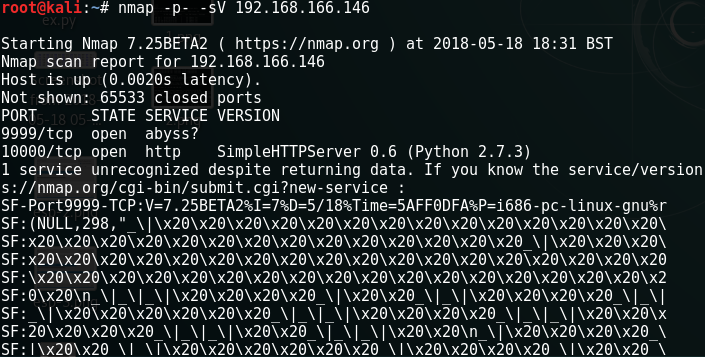
Once you commence testing in earnest - which should obviously always be on a pre-agreed date, with full written authorisation from the site owner and having made IT and/or relevant hosting company aware where applicable - the first place to start is always with an Nmap scan. Although we are only focussing on the web application itself here, as noted above it is not uncommon for services related to the web application to be running on different ports, so do not limit yourself to the port the “main” application is using. Make a note of each one, and investigate each one thoroughly, referring as appropriate to vendor documentation if applicable. I recently tested a site where a default Developer account was left enabled and though this account couldn’t log in via the web interface, through research I was able to find out that the account could log in via a specific IDE tool using a dedicated port. So, I downloaded and installed the IDE and then after some quick config settings gained access to the site’s backend code with developer privileges.
Right at the start, running Nikto against all discovered ports is also highly recommended as this will quickly find any obvious areas of interest or potential vulnerabilities that you will definitely want to investigate.
I normally start all tests from the perspective of an unauthenticated user who has been issued no credentials for the site. What can such a user do? Well, as noted, if you can find any default credentials for inbuilt accounts or if you’ve been able to pilfer any accounts from other sources then that’s going to be a good start. If you have no passwords but you do have some ideas about potential username formats or any known usernames then it’s worth trying some basic passwords (‘admin’ ‘password’ etc.). Note this is purely manual testing at this stage. Be careful though! We don’t want to be locking accounts out and it’s definitely good practice to find out what the lockout policy is, if any for the site before doing this.
Next, I like to take the sitemap I’ve built up in Burp and extract the URLs (Burp lets you export as a file). To this we can add any other known files we’ve found from user manuals and our earlier manual recon of the site. We can now use one of several tools (Burp, Gobuster, Dirbuster etc.) with our list of target filenames and automate a simple GET request for each of them. Look at the HTTP response code and response length. You may be surprised to learn that oftentimes developers simply fail to include the authentication code in some pages. This can often happen with old, large sites that many different teams have worked on over the years. In a recent test I found an XML page that was accessible to unauthenticated users, containing configuration details including a username and password. I have found many times that while core application pages with the right extension (e.g. .aspx etc.) will correctly enforce authentication, anything else is happily served up without a challenge. With this in mind, it’s also a good idea to take your file list and experiment with changing the file extension. So let’s say we have a known file called UserAdmin.aspx. You definitely want to be testing for the existence of files that should have been deleted such as UserAdmin.aspx.old, UserAdmin.aspx.bak, UserAdmin.aspx.tmp, UserAdmin.old, UserAdmin.bak, UserAdmin.tmp and so on. Again, use one of the previous mentioned tools to automate this. Most likely, if you get lucky the file will get served up with no authentication and you’ll get access to the application source code for the page which may in turn reveal further useful details.
After this, we can try some plain old bruteforcing for more files and directories (Gobuster or Dirbuster are good for this) and always use SQLMap against the login screen, testing both the username and the password inputs.
Usually by this stage, I have gained some level of access to at least some pages. If I’m lucky, the above approaches will have yielded usernames and passwords that I can use to further my access. The bottom line is the more preparation and research you do in advance, the better your chances of compromising the application without being given any testing credentials. However, some sites will always prove resistant to unauthenticated attack and so there is no option other than to test from the perspective of an authorised user.
I like to have at least two test accounts for authenticated testing. One low-privileged and one with administrator access. With the administrator account we can browse the site and build up our sitemap further in Burpsuite. We can then do the same with the lower privileged account and work out the delta – i.e. what can the admin user see and do that the normal user can’t? For this stage of the test, what we are trying to do is establish is whether a low-privileged user can elevate their privileges to that of a site administrator or other superuser. So how exactly might this be done?
Well, it’s no surprise that Broken Access Control occupies the top spot on the OWASP Top 10. For some reason, most web developers seem to struggle mightily with correctly enforcing authorisation and if there has been one constant throughout my testing career it is definitely this. Let’s look at some common mistakes:
1. Security through obscurity. Even though people have been building websites for getting for 30 years, some developers still seem to believe that if something is hidden from a user (i.e. it’s not in their menu options) then there’s no way they can access it. Typically, what happens in this situation is the site menu and navigation bars are created dynamically based on the role the user holds within the application. However, if you simply browse to a supposedly restricted page, you will be able to access it no problem because in reality there is no actual access control being enforced at all. They have simply removed links to the pages you are not supposed to see.
2. Attempting to enforce field-level authorisation on the client-side. Another thing I sometimes see is the use of client-side code such as HTML and JavaScript to enforce field-level restrictions. So for example, certain fields on a page may not be visible to certain roles or may be “greyed out” etc. Take a look at the source code of the page. If you’re seeing HTML attributes like “disabled” or “hidden” in form fields this is a sure sign that the site developers have failed to understand the basic web security principle that security cannot be enforced client-side. Turn on HTTP response interception in Burp and, if necessary, add matching conditions for .js and .json files. Delete all the disabled, hidden etc. parameters in the response before forwarding it back to the browser. With luck, you will suddenly find that your low-privileged account has access to a lot more functionality than it is supposed to.
3. Failing to protect against spoofing. After logging in, you may see your browser issuing a request to some kind of service designed to establish your permissions in the application e.g. GET /UserRole.aspx?id=[your username]. This will perform a query behind the scenes to establish your permissions and based on this will set some kind of session variable that’s used to ensure your access is restricted appropriately. This type of thing is often vulnerable to spoofing attacks because, once again, the developer has failed to realise that the end user has full control over what requests the browser sends to the server. All we need to do, via Burp or whichever proxy we are using, is swap out our username in the request for that of a known administrator. If we’re lucky, the developers will have failed to provide any sanity checking to make sure the username passed here actually matches that of the logged in user and if all goes well, we will henceforth have the admin permissions for the remainder of our session with the site.
So let’s talk now a bit about modern web apps that typically provide a JavaScript/SPA UI which communicates with a REST API at the backend which in turn talks to the database. Obviously, we’re going to try to interact with that API, first by sending unauthenticated requests and then authenticated requests. (Tip: Burp Repeater is great for experimenting with API responses). The most important thing we need to figure out is how the API is authenticating our requests and deciding whether to give up the information we’re trying to extract. Invariably our HTTP request will contain an authorisation header and the value of this will be a key of some kind. Pay attention to the value of the key. Does it change with every request, or with every session? Does it stay the same? If you find that the key value does not change over different sessions, it is probably hardcoded somewhere in the application. Can you find it? If you can, once you know how the API requests are structured you can ignore the UI frontend completely and just work with the API directly. If the key value changes, is it completely random or is it predictable? This is worth spending time on because if the developer has screwed up the creation of these keys, you’re going to need to work out how, and how this can be abused!
Other things we can and should test for are common issues like directory traversal and cross-site scripting and again we can automate this process to good effect using appropriate tools and wordlists. Being able to break out of the web root directory and gain access to other directories and files on the filesystem is something I see less of these days but occasionally this is still possible. It’s always worth running SQLMap over the site as well, again SQL injections are much less common than they used to be but if it’s an old site that has not been maintained then you never know, you may just get lucky!
I hope this article has proved interesting and useful. Please leave any comments or questions below and I’ll try to answer them.

Comments
Post a Comment